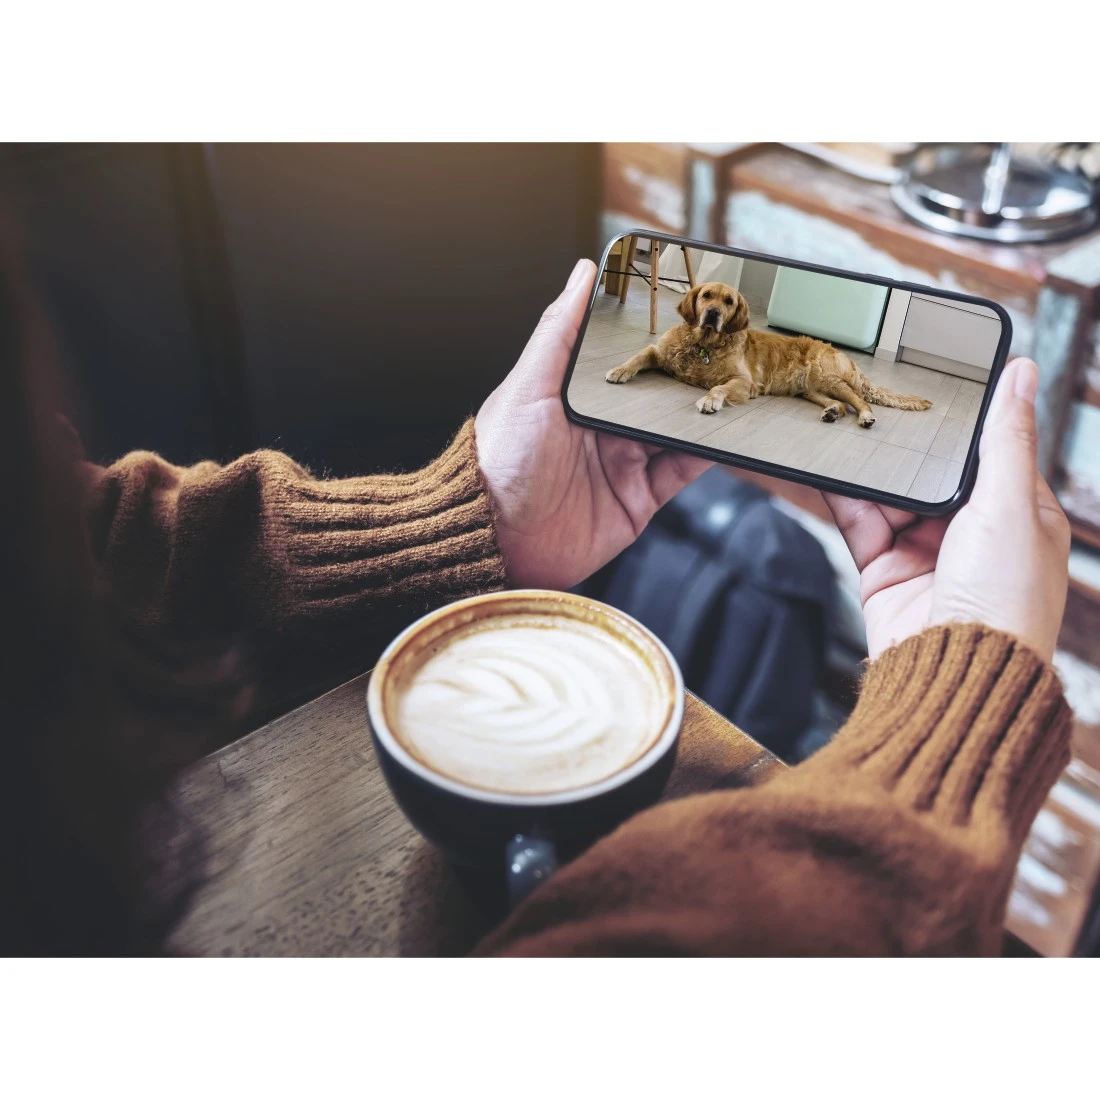
WiFi camera for a secure home
Would you like to be able to take a quick look in your living room even when you are not at home? Or check on your baby without having to go into their room? With our WiFi surveillance camera, you can view an image of your home from afar and make sure everything is alright.
Our smart camera can be controlled from anywhere by app. With a field of view of 110 degrees, it produces excellent images at any time (day or night), and is very easy to install.
Convenient surveillance using a smartphone and app
With the WiFi camera and our app, you can always keep an eye on your rooms – regardless of whether you are at home or away. You need to carry out a few steps to connect the WLAN camera to the WiFi network and configure the app. With our step-by-step guide, you will manage it in no time at all.
1. Download the app from the Apple App Store or the Google Play Store.
2. Connect the WiFi camera to the power supply unit using the USB cable supplied, and plug the unit into a power socket.
3. When the camera has been connected, the app will indicate the QR code and provide instructions on how to scan it with the camera. Now scan the QR code. When the camera has successfully recognised the code, it will give a brief acoustic signal. Confirm in the app that you have heard the acoustic signal.
4. The camera will now be connected. Once the connection has been established, the LED stops flashing and emits a constant blue light. Now you can set up, control and configure your WiFi camera using the app.
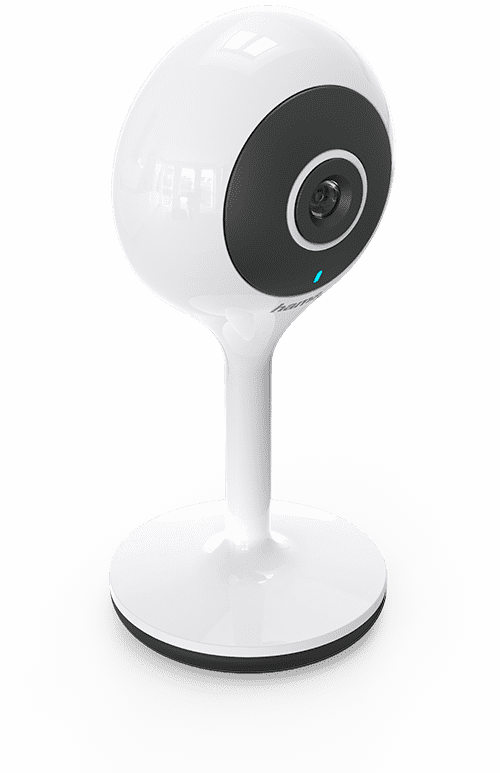
This is absolutely doable! You can’t do anything wrong when you install an app. The WLAN surveillance camera receives power via the Micro-USB port and the included power supply unit. Therefore, you can set up the WiFi camera anywhere where there is a power socket.
Simple installation without a hub
Many smart home products require an additional gateway that functions as a transmitter between the wireless network and device. Without this gateway (also bridge or hub), a connection cannot be established between the smartphone/tablet and smart device (smartphone/tablet – WiFi – gateway/bridge – smart device). Here, Hama has a clever and practical solution: The WiFi camera can be installed without a gateway and integrated directly into your wireless network – this simplifies installation and saves additional costs.
Reacts to movement and sounds
The camera reacts to movements: If, for example, a dog or an intruder scurries past the WLAN camera, it will react. Firstly, the event is automatically recorded; secondly, you receive a push notification on your smartphone.
In addition, the camera reacts to sounds: Whether it’s the dog barking or the baby crying – as soon as the camera detects sounds, it reacts. You can select between two sensitivity levels (High 65 dB, Low 85 dB). The sounds are not recorded, but you can choose to receive a push notification if/when audio is detected. The notifications are displayed as popup messages on your smartphone without you having to open the app. This means you are informed immediately and can respond very quickly. If the messages disturb you, you can always turn off the push notification, or set it up so that a popup message is received, but without sound. The sound sensitivity levels have been set up such that a normal conversation or normal operating noises do not trigger a camera reaction. Therefore, you do not have to creep about after setting up your new WiFi camera. To ensure that you are not constantly flooded with messages – for example, if a loud lorry stops in front of your house or a bin lorry comes by – our push notifications have a 60-second block. When the first clank is detected, you will receive a message; thereafter, only after 60 seconds. If necessary, you can turn off the function completely.
Night vision function
Thanks to the night vision function, the camera also sees in the dark. So if a would-be burglar thinks your home is an easy target at night, they’ve got another thing coming! Thanks to the special IR LEDs, which light up the room at night, the night vision function also works in totally dark rooms. The range does, however, depend on the room and the objects to be lit up. With the night vision function, the camera is of course also perfectly suited for use as a baby monitor.
Perfect as a baby monitor and surveillance camera
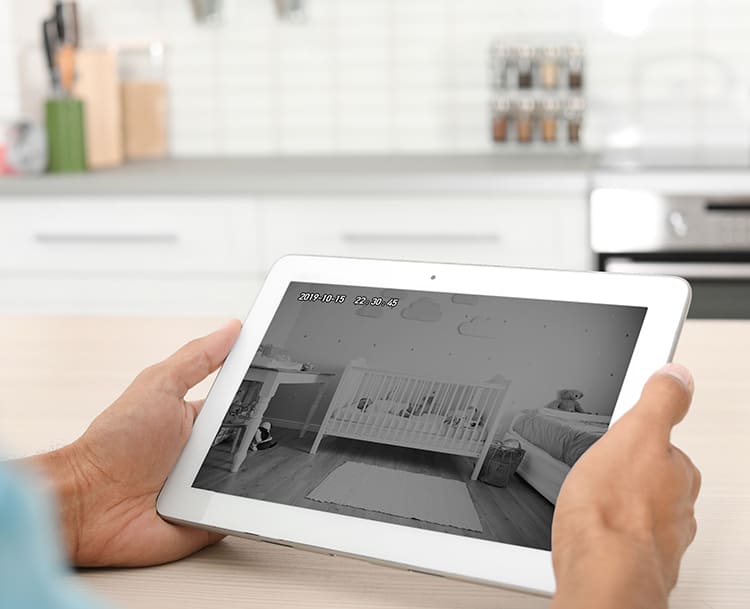
The WiFi surveillance camera is equipped with a microphone and speaker, enabling it to do more than just detect unwanted intruders. The two-way audio communication is perfect for baby monitoring. You can monitor your baby while it sleeps, but are also notified as soon as it cries – this way, you can talk to your baby immediately, before making your way to the cot.
You have a new pet, or are training a puppy to be left alone. Who would not like to be a fly on the wall and watch what our four-legged friends get up to – and, above all, intervene before the cushions are torn apart.
You care for your elderly parents, but cannot be at home right around the clock. The WiFi camera gives you peace of mind and allows you even to take a stroll into town – you can always take a look and check using the app.
Storage of the video recordings
You can follow everything in real-time via app, and respond. Thanks to the microSD card slot, you can use a microSD card with a capacity of up to 128 GB – if surveillance extends over a long period, this is not a problem because the video material is stored on the card. The video format is MPEG-4 and there are two resolutions for filming: SD: 640 x 360 px and HD: 1920 x 1080 px. The number of days of video that can be recorded/stored on the card varies according to the resolution. In SD resolution, about 180 days can be recorded, and in HD, about 20 days. The video material can also be stored in the cloud using our app; however, this is chargeable.
Up to 128 GB
SD: 640 x 360 px
HD: 1920 x 1080 px
SD: 180 days
HD: 20 days
via app
Several people can access the camera at the same time
The multi-user function is also practical. If you are away on holiday, your children or the neighbours can carry out surveillance, as they can be given access to the app.
You can create up to five people as family members in the app. They then have full access to all devices until their membership is ended. Authorisation on all devices will then also come to an end. You can, however, also ‘share’ devices individually with other people. This share can also be individually revoked for each device. When sharing, it is important to note that only usage is shared; the share does not apply to the editing of settings.
Good news:
All Hama Smart Home products can now be controlled not only with Alexa and the Google Assistant, but also with the voice assistant Siri.
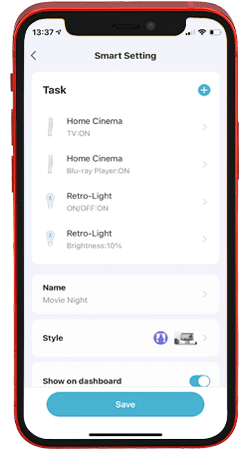
1 Create a scene
The Siri Shortcuts function enables the control of smart scenes that first have to be created. For this purpose, create a scene in the usual way that you want to activate with Siri. The existing process remains unchanged.
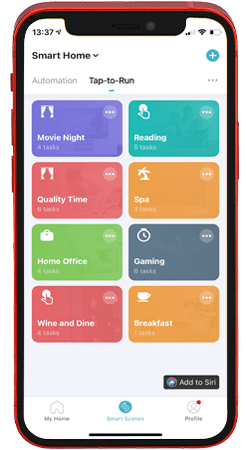
2 Open Siri Shortcuts
In the app The overview page displays all set-up scenes. You will find the new ‘Siri Shortcut’ button in the lower right-hand area. Tap the button.
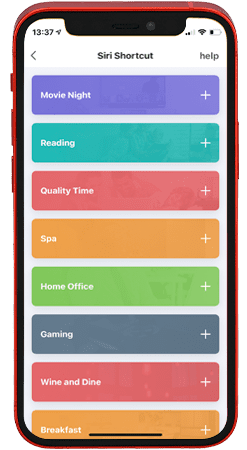
3 Select the scene you want
A page opens, on which you can add your scenes to a Siri Shortcut. To do so, press the plus sign next to the relevant scene.
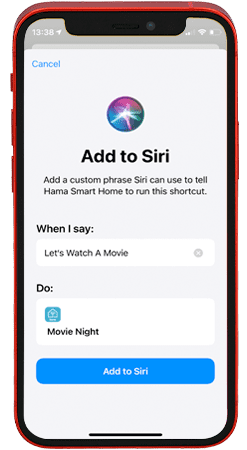
4 Create a shortcut
You can now create the shortcut. To do so, enter the wording for the command that is to be used to start this scene. If, for example, you have created a scene for a film night and would like to add it to the Siri Shortcuts, a suitable command would be ‘Start the film night’. Once you have tapped ‘Add to Siri’, you can then simply say to Siri, ‘Hey Siri, start the film night’. Siri will then run the ‘Film night’ scene from the Hama Smart Home app.
Additional tip: To control individual devices with Siri, simply create short scenes that are responsible only for switching on, switching off or switching over the individual device, and add them to Siri. ‘Fan on’, ‘Light off’, ‘Hey Siri, see to the light’ – there are no limits to your imagination!


